

2.9 Save and Transmit the Forecast
Make sure you follow the procedure for saving and transmitting a forecast to avoid losing your work.
After reviewing the data in each segment of the forecast group (and making necessary changes), you must run the forecast in order to save your work.
Use the following steps to run the forecast:
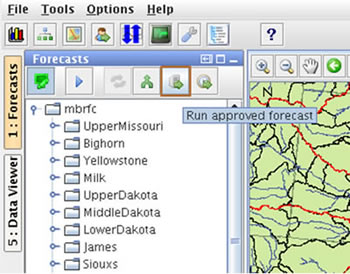
- Select your forecast group folder in the Forecasts panel.
- Click the Run approved forecast button.
At this point, the forecast group folder icon becomes an hourglass and then it will change to a green arrow while CHPS is processing your forecast.
Processing time varies, depending on how large the forecast group is and how many modifiers were made. Eventually, a green check mark will appear beside the forecast group folder.
CHPS provides an option for viewing your forecast status. The Forecast Management tab lists all forecasts sent to the Central Database. Forecasts are marked with color-coded status icons.
The previous steps have not formatted or transmitted your forecasts. You must still format and transmit.
Offices use a variety of software applications to transmit forecasts. Work with your DOH to determine the method used at your office.
After you have completed formatting and transmitting your forecast, look up the product in AWIPS to ensure it made it to other NWS users. Also, check your office’s web page to see if the forecast updated and is available for external users.
 Use the following job sheet as a guide when creating a forecast.
Job Sheet: Creating a Forecast