

4.6 Importing Canned Data Sets
Preparation
Before beginning the import of data into the CHPS SA, ensure the following:
- The SA runs without errors.
- You have the latest system configuration (i.e. /Config and root configuration files).
- You have the canned data for the exercise and the correct paths to those data sets.
- Recommendation: Delete the contents of the local datastore prior to starting the data import (i.e., start from an empty database).
Data Import General Procedure
Use the following steps to import data. Note: Click the links to see images of the actions described below. Images open in a new window.
Creating the Warm States
- Select and copy observational data from the preparation directory into CHPS SA import directory.
- Start the CHPS SA.
- Adjust the system time to starting date of the event.
- Open manual forecast display.
- Run the Import workflow and verify its completion in the log panel.
- Run the Preprocess (RRS) workflow as a cold state making sure to set the correct cold state time to the start of the observational data and verify its completion in the log.
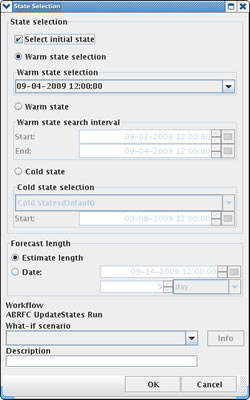
- Run the forecast group UpdateStates workflows as a cold state using the same time period as the Preprocess (RRS) workflow and verify its completion in the log panel.
Warm states have now been generated for the model. Now add the data for the “current” day on which the forecasting will begin.
Reminder: Since the antecedent conditions are not included, the warm states will not produce identical results as the event being simulated.
Event Day One
- Select and copy observational data into CHPS SA import directory for day one of the event.
- Adjust the system time to day one of event.
- Open manual forecast display.
- Run the Import Workflow and verify its completion in the log panel.
- Run the Preprocess (RRS) workflow and verify its completion in the log panel.
You are now ready to begin the event simulation. Now go to the IFD in forecasting mode.
- Use the run options panel to select the newly created warm states.
- Select a forecast group, and begin systematically making forecasts for each segment within the forecast group.
- Run the UpdateStates workflow (e.g. ForecastGroup_UpdateStates) for the selected forecast groups.
Follow the same procedure used for Event Day One to move to the next forecast period, but add the observational data for the next stage, Event Day Two.
Complete this general process through the end of the event, remembering to update states after approving each day's forecast.
Click here for instructions on importing the data using the non-archive method.